Tech How-to: Disassembly of a LaCie Rugged External Hard Drive
- kilmermedia
- May 18, 2012
- 3 min read
Updated: Nov 18, 2024
Welcome! This is one of our most-visited posts. If it ends up being useful for you, please consider supporting this website by making a donation via Paypal or Buy Me A Coffee. You'll find these links at the bottom of this page, as well, and thank you to those who have already helped us out! |
In my experience with rotating through a couple dozen LaCie Rugged external hard drives over the past decade, I've found them to be very reliable. Of course, all drives will eventually fail, but the ports often go out on these particular drives first. More than once, I've been able to salvage data by removing the hard drive from the housing and plugging it into a drive dock. Here's how to take the Neil Poulton designed aluminum case apart... Before you begin, be sure to unplug any cables connected to the hard drive and to discharge all potential static built up on you/your clothing by touching a grounded, metal object that is not the hard drive. It seems like basic stuff but is really important.
This set of instructions applies to any of the older LaCie Rugged series drives (USB 2.0/3.0/Firewire). Similar instructions apply to the newer generation of these rugged drives and can be found via the blog post link at the bottom of this page. The video version of that disassembly process can also be found down there.

Remove the rubber bumper.

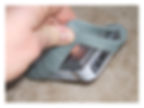
With care, pry the overlapping aluminum tabs on the side of the drive up to about a 45 degree angle. These tabs are fragile – four of them broke off in this disassembly process – so only pry them up far enough to clear the underlying tab. Warning! Warning! Warning! Breaking the sticker will void your warranty (if you still have one).

Again, the tabs need not be pried as far apart as shown in the image below.

At this point, the top and bottom of the case will come right off.

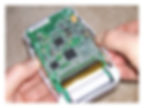
The plastic around the hard drive and circuit board is very flexible, so pull the sides far enough apart and the drive will swing out.

The small, black rubber bumpers that act as a shock mount for the hard drive may fall right off. If that happens, no big deal, as they slide right back on if you need to reassemble the drive in the case.

This particular hard drive uses an IDE connection...

...and the ribbon cable:

Below, you can see the aluminum tabs broken off from prying them further than needed… The case should hold together as long as a couple sets of interlocking tabs are left. You can use some electrical tape under the bumper, as well, to make sure the case firmly holds together.

For potential data recovery, in 2023, you can still pick up an IDE to USB adapter from many of the usual tech retailers, like Newegg, Best Buy, Walmart, Amazon, etc.
Video of disassembling a newer, but similar version of the rugged drive:
"Tech How-to: Disassembly of a LaCie Rugged External Hard Drive"
Written by: Justin Kilmer
All images and media on this site are © by Justin Kilmer, unless otherwise noted.
If this post has helped save you time or money (or helped recover a drive that seemed to be dead), please consider saying "thank you" by donating to this ad-free site via the PayPal button below (the average amount is $5):
...or you can Buy Me a Coffee.
If you would rather buy something, check out these photo prints at Fine Art America.
This post was written entirely by a human. It was last updated in Nov. 2024.
#teardown #drive #tricks #uncase #removal #internal #breakdown #replace #harddisk #lacie #data #instruction #maintenance #apart #computer #rugged #info #technology #harddrive #takeapart #repair #external #disassemble #electronics #travelstar #tech #uncasing #tips #storage #disassembly #case #howto #portable #enclosure #free #memory


